How to Take Professional Food Photos with a Smartphone and Use Natural Light
Published Date:

You might think that those mouthwatering, high-resolution food photos you see on social media, professional food blogs, or popular recipe apps require complex studio setups and expensive DSLR cameras. However, with today’s advanced smartphone cameras, computational photography, and a foundational understanding of lighting, you can create stunning food photos right at your kitchen table. The secret lies not in the camera itself, but in how you compose the shot.
Why You Don’t Need a DSLR for Great Food Photography
The gap between professional cameras and smartphones has narrowed significantly in recent years. Modern smartphones use computational photography, software that automatically adjusts exposure, HDR, and color balance the moment you press the shutter button. This means that your phone is often doing heavy lifting that a photographer with a DSLR would otherwise have to do manually in post-processing.
While a DSLR offers superior depth of field and massive resolution for printing billboards, food photography on social media or recipe apps is viewed on small mobile screens. On these screens, composition, styling, and lighting matter infinitely more than megapixel count. A beautifully lit, well-styled bowl of soup shot on a five-year-old smartphone will always look better than a poorly lit, messy plate shot on a $3,000 professional camera. By mastering a few accessible techniques, you can turn your everyday meals into visual masterpieces.
Step-by-Step Solution: Mastering Smartphone Food Photography
Here are the top food photography hacks to make your dishes look magazine-ready, compiled by our kitchen companion Tarif. Follow these structured steps before taking your next culinary photo.
Step 1: Using Soft Natural Light
Light is the single most critical element in any photograph. The biggest mistake amateur food photographers make is using their phone’s built-in flash or shooting directly under harsh overhead yellow kitchen bulbs. These artificial light sources distort the natural colors of the food, create harsh glare on oily surfaces, and cast unflattering, deep shadows that make the food look unappetizing.
The Solution: Turn off your kitchen lights and move your dish near a large window. Soft, indirect natural daylight hitting the food from the side brings out incredible textures and authentic colors. The direction of the light matters. Side lighting creates a three-dimensional effect by highlighting the texture of the food. If the direct sunlight pouring through the window is too intense (creating hard shadows), diffuse it by hanging a thin white curtain or holding a piece of white parchment paper between the window and your food.
Step 2: Choosing the Perfect Angle
The ideal camera angle is entirely dependent on the physical structure and layers of the dish you are shooting. Never shoot a tall burger from directly above, and never shoot a flat pizza from eye level.
- Overhead Angle (90-Degree / Flatlay): Best for flat dishes like pizzas, tarts, smooth bowls of soup, or flat layouts of multiple bowls. This angle allows you to showcase the entire scene, including your beautiful props and table setting.
- The 45-Degree Angle: This mimics the human eye’s perspective when sitting at a dining table. It is the most versatile angle, capturing both the top surface details and the depth of the dish. Use this for pasta bowls, salads, and most standard plated meals.
- Eye-Level Angle (0-Degree): Perfect for layered foods like towering burgers, stacked pancakes, tiered cakes, or tall glasses of iced drinks. This angle emphasizes height and allows the viewer to see every delicious layer.
Step 3: Composition and the Rule of Thirds
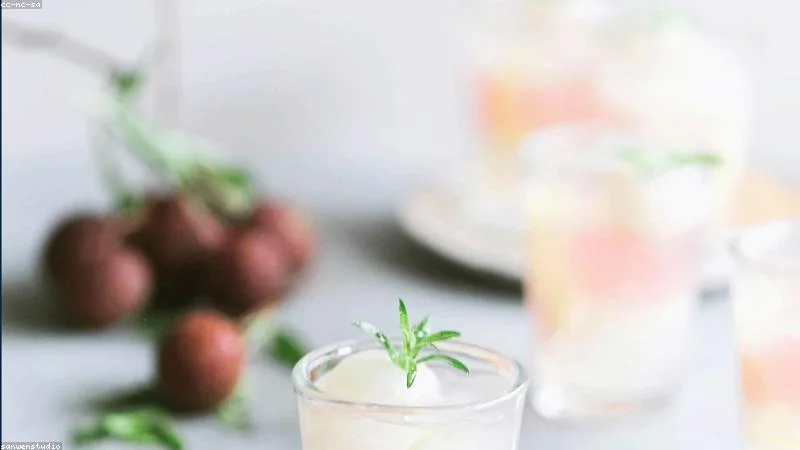
A common beginner mistake is always placing the plate dead-center in the frame. While center composition works occasionally, employing the Rule of Thirds makes your photos instantly more dynamic. Imagine your phone screen is divided by two horizontal and two vertical lines, creating a grid of nine equal squares (you can actually turn this grid on in your phone’s camera settings).
Place the most important element of your dish, like the perfectly jammy yolk on a fried egg or the melted cheese stretching from a slice of pizza, along one of the intersections where these lines meet. This naturally draws the viewer’s eye across the image rather than forcing them to stare at a static center point.
Step 4: Pro-Level Prop Styling
Rather than placing a lone plate in the middle of a blank, boring table, frame your subject with styling props that tell a visual story about how the recipe was made.
The Strategy: Scatter raw ingredients used in the dish around the plate. If you made a pasta dish, leave a few raw cherry tomatoes, fresh basil leaves, and a dusting of parmesan cheese on the table. Place a textured, slightly wrinkled linen napkin underneath the bowl to add warmth, and arrange rustic, matte-finished cutlery nearby. For an authentic kitchen feel, use jars from your pantry essentials for quick meals as background elements. The goal is to make the scene look casually messy, yet intentional.
The Magic of Smartphone Editing Apps
Taking the photo is only half the battle. A slight post-processing edit can transform a good photo into a stunning one. Avoid using heavy, artificial-looking filters native to social media apps. Instead, use dedicated editing apps like Lightroom Mobile, Snapseed, or VSCO to make subtle adjustments.
Focus on these three adjustments:
- White Balance (Warmth/Tint): Ensure the whites in your photo (like the plate or a napkin) actually look pure white, not slightly blue or orange.
- Contrast and Shadows: Increase contrast slightly to make the colors pop, and lift the shadows so the darker areas of the food aren’t lost in blackness.
- Saturation: Give the saturation a tiny boost, specifically targeting the reds and greens, to make fresh vegetables and sauces look vibrant and fresh.
Prevention: 3 Common Photography Mistakes to Avoid
Even with great light and composition, certain errors will ruin a food photo.
- Using Digital Zoom: Never pinch your screen to zoom in on your food. Digital zoom drastically degrades image quality and introduces pixelation. Instead, physically move your phone closer to the food.
- Dirty Lenses: Our smartphones sit in our pockets and get covered in fingerprint smudges all day. Always wipe your phone’s camera lens with a microfiber cloth or your shirt before taking a photo. A smudged lens creates a blurry, glowing effect that cannot be fixed in editing.
- Shooting Cold Food: Hot food looks best when it is actually hot. Melted cheese hardens quickly, sauces form skins, and steam dissipates within a minute. Set up your lighting, props, and Sunday weekly meal prep containers before the food is finished cooking so you can shoot it the second it hits the plate.
When to Seek More Help or Watch for Edge Cases
If you are shooting in the dead of winter or late at night, natural sunlight is simply not an option. In these edge cases, relying on standard room lighting will ruin your shots. You will need to invest in a continuous artificial light source, such as a small LED panel or a ring light, designed specifically for photography. Ensure the light is “daylight balanced” (around 5500K) so your food doesn’t look artificially orange or blue. Position the artificial light to the side or slightly behind the food, just as you would with a window, and place a white bounce card on the opposite side to fill in harsh shadows.
Quick Summary
- Never use your phone’s flash or overhead kitchen lights; always shoot near a window using soft, indirect natural daylight.
- Match your angle to the food: flatlays for pizzas, 45-degree for salads, and eye-level for tall burgers or layered drinks.
- Turn on your camera’s grid feature and use the Rule of Thirds to place your subject off-center for a more dynamic composition.
- Tell a story with props by scattering raw ingredients, textured linens, and matte cutlery around the main dish.
- Clean your smartphone lens before every single shoot to prevent blurry, glowing images.
- Edit subtly using apps like Snapseed or Lightroom to correct white balance and gently boost contrast.
Frequently Asked Questions
Why do my food photos always look blurry on my phone?
The most common cause of blurry smartphone photos is a dirty camera lens covered in fingerprint oils. Always wipe the lens with a soft cloth before shooting. If the lens is clean, the blur might be caused by camera shake in low-light conditions; try resting your elbows on the table or using a small smartphone tripod to stabilize the shot.
Can I use the portrait mode on my phone for food photography?
Yes, portrait mode can look fantastic for food photography, especially at a 45-degree angle. It artificially blurs the background, creating a shallow depth of field that mimics a professional DSLR lens. However, be careful with complex subjects (like a messy salad or multiple glasses), as the software sometimes accidentally blurs edges that should remain in focus.
What should I use for a background if my dining table is ugly?
You do not need a beautiful dining table to take great photos. Purchase a few inexpensive vinyl photography backdrops that look like rustic wood, marble, or slate. Alternatively, you can buy large ceramic tiles from a hardware store or simply use a clean, ironed bedsheet draped over a table to create an instant, professional-looking surface.
Why do my reds and greens look dull in my photos?
Dull colors are usually the result of poor lighting or incorrect white balance. Shooting under artificial yellow room lights will wash out vibrant colors. Move to natural daylight, and in your editing app, slightly increase the “vibrance” or “saturation” slider. Some apps also let you selectively target specific colors to make only the greens or reds pop.
Is it better to shoot food horizontally or vertically?
This depends entirely on where the photo will be published. If you are shooting for Instagram Reels, TikTok, or Pinterest, vertical (portrait) orientation is highly preferred because it fills the entire mobile screen. If you are shooting for a traditional blog post, a YouTube thumbnail, or a website header, horizontal (landscape) is generally better. When in doubt, take both versions.
Share Your Culinary Masterpieces with Tarif!
Ready to showcase your styled food photos and custom recipes to a food-loving community? Download the Tarif app. Use Tarif’s social network and creator toolkit to publish your dishes, exchange styling feedback, and gain followers. Download Tarif App Now and showcase your culinary skills to the world!