How to Grow Spring Onions from Kitchen Scraps in Water
Published Date:
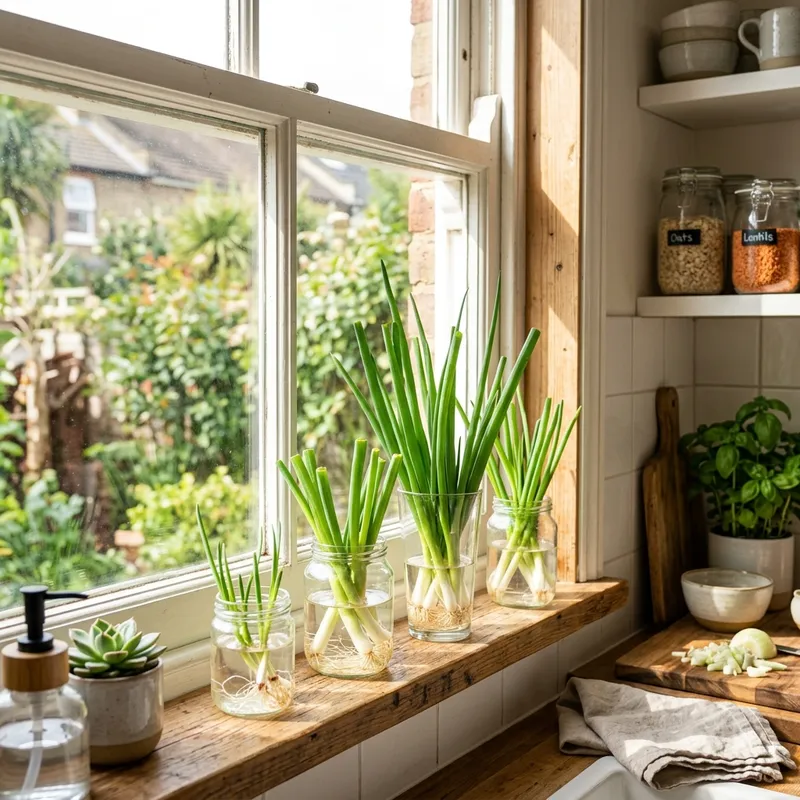
Spring onions (also known as scallions or green onions) are one of the most versatile ingredients in the kitchen. They provide a bright, mild onion flavor and a beautiful pop of green color to everything from Asian stir-fries to simple scrambled eggs. However, they are also incredibly fragile. They often end up half-used in the crisper drawer, slowly wilting and turning into a slimy mess before you have a chance to finish the bunch.
Instead of throwing away the root ends of your spring onions, you can easily regrow them using nothing but a glass of tap water. This is arguably the easiest, most rewarding zero-waste kitchen experiment you can undertake, yielding a continuous supply of fresh, organic greens right on your windowsill.
Why Regrowing Scraps is the Ultimate Zero-Waste Hack
The modern food supply chain is remarkably resource-intensive. When you throw away the root end of a vegetable, you are discarding a living plant that still possesses the cellular potential to regenerate. Regrowing kitchen scraps is a direct way to intercept food waste before it hits the landfill. It drastically reduces your grocery bill over time and significantly lowers your household’s carbon footprint by minimizing the packaging and transportation associated with buying fresh herbs weekly.
Spring onions are the perfect gateway into kitchen gardening because they are incredibly resilient. Unlike growing tomatoes from seeds, which requires months of patience and specific soil conditions, spring onions provide instant gratification. You can literally watch them grow millimeter by millimeter every single day. If you regularly practice weekly Sunday meal prep, having a continuous supply of fresh green onions on the counter means you can easily garnish your prepped meals throughout the week without ever worrying about them spoiling in the fridge.
Step-by-Step Solution: How to Regrow Spring Onions in Water
Regrowing spring onions is foolproof if you follow the correct sequence. Here is the step-by-step guide compiled by our kitchen assistant Tarif.
Step 1: Prepping and Cutting the Roots
The process begins the moment you chop your store-bought spring onions for a recipe. Most people cut off the very bottom white bulb and throw it away. To regrow them, you need to leave a bit more of the bulb intact.
- The Cut: Using a sharp knife, slice the spring onion about 2 to 3 centimeters (roughly 1 inch) above the root base. The cut should be clean and straight across.
- The Roots: Do not trim or tear away the little hairy roots dangling from the very bottom of the bulb. This root system is the lifeline of the plant; it is exactly where the water absorption occurs to fuel the regrowth.
Step 2: The Water Setup
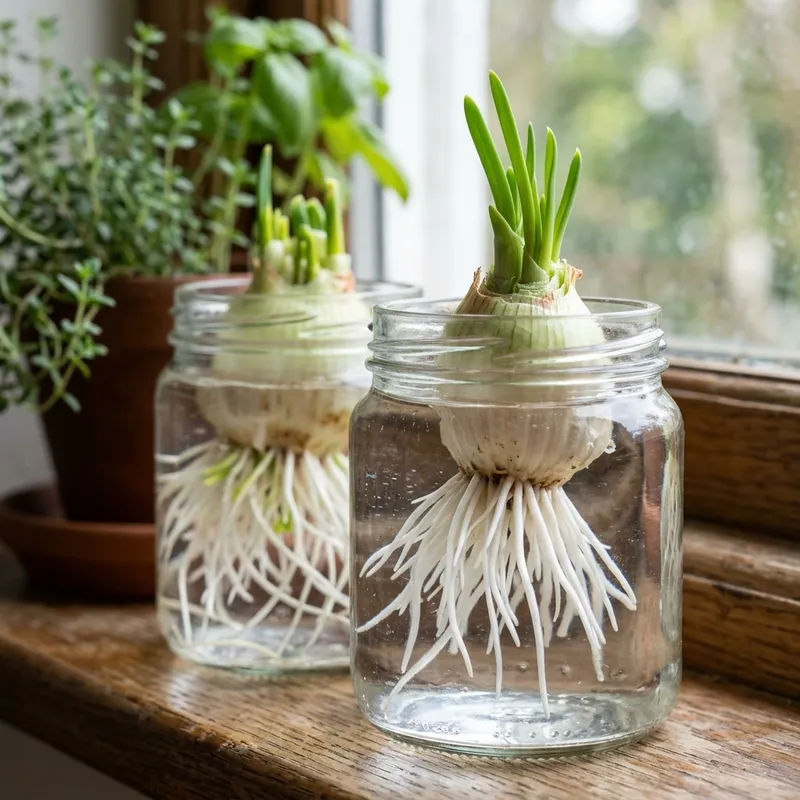
You do not need fancy hydroponic equipment. Any small, heavy-bottomed glass container will work: a shot glass, a small mason jar, or a repurposed yogurt jar is perfect.
- The Placement: Place the cut root scraps upright in the jar so the hairy roots touch the bottom.
- The Water Depth: This is the most critical step. Pour room-temperature tap water into the glass just enough to cover the hairy roots and the very bottom of the white bulb. Crucially, the top cut opening of the bulb must remain exposed to the air. If you submerge the entire white bulb underwater, the plant cannot breathe and will quickly begin to rot.
Step 3: Proper Sun Exposure
Like all plants, your spring onions need energy to synthesize new growth.
- The Location: Place the jar on a bright, sunny windowsill. A south-facing or west-facing window that receives plenty of indirect sunlight is ideal. If your kitchen does not have a sunny window, any brightly lit room will suffice, though the growth rate may be slightly slower. Ensure the glass is not placed directly above a hot radiator in the winter, as the heat will rapidly evaporate the water and bake the delicate roots.
Step 4: Daily Maintenance and Harvesting
Within just 24 to 48 hours, you will see a pale green shoot emerging directly from the center of the cut bulb. By day three, it will be distinctively green and several centimeters tall.
- Water Changes: To prevent bacterial buildup and foul odors, you must change the water every single day. Dump the old water out, rinse the roots gently under a slow tap if they feel slimy, and refill the jar with fresh room-temperature water.
- Harvesting: In about a week to ten days, your spring onions will have grown back to their original size. You can use sharp scissors to snip off the green tops whenever you need them for a recipe. Leave the white bulb and roots in the water, and they will simply grow back again!
The Next Step: Transitioning to Soil for Long-Term Growth
While regrowing spring onions in water is incredibly easy, it is not a permanent solution. Water alone does not contain the complex nutrients a plant needs to survive indefinitely. After two or three harvest cycles in water, the new green shoots will start to look pale, thin, and stringy, and they will lose their sharp, pungent flavor.
To keep your spring onions growing vigorously for months on end, you should eventually transplant them into soil. Once the root system in your water glass looks long and thick (usually after a week), fill a small pot with standard potting soil. Plant the bulbs so the roots are fully buried but the green shoots remain above the dirt. Water the soil thoroughly and place the pot back on the sunny windowsill. Soil-grown spring onions will develop a much stronger flavor and thicker stalks.
Prevention: Common Mistakes That Cause Rot
The only way this project fails is if the onions begin to rot. Rot is characterized by a strong, unpleasant sulfur smell, cloudy brown water, and bulbs that feel mushy to the touch.
To prevent rot, avoid these three common mistakes:
- Drowning the Bulbs: As mentioned, never fill the water past the bottom third of the bulb. The top cut must breathe.
- Ignoring Water Changes: Stagnant water is a breeding ground for bacteria. Skipping water changes for three days guarantees a slimy, rotting root base.
- Overcrowding the Glass: If you pack too many onion scraps into a tiny shot glass, the lack of air circulation between the bulbs will trap moisture and encourage mold. Give them a little space to breathe.
If a bulb does succumb to rot, do not throw it away entirely. You can toss it into a freezer bag with other vegetable peelings to make vegetable broth from scraps later, ensuring absolutely nothing goes to waste.
When to Seek More Help or Watch for Edge Cases
If you notice your spring onion shoots are growing incredibly slowly or look completely white instead of green, the issue is a lack of sunlight. The plant needs light to produce chlorophyll (which creates the green color). Move the jar to a brighter location immediately. Alternatively, if the green shoots are growing but the tips are turning brown and crispy, the air in your home might be too dry, or you may be using water that is highly chlorinated. If you suspect your tap water has high chlorine levels, let a pitcher of water sit out on the counter overnight to allow the chlorine to evaporate before using it on your plants.
Quick Summary
- Cut the white bulbs 2-3 cm from the root and never trim the hairy roots at the bottom.
- Place upright in a small glass and add just enough water to cover the roots.
- Never submerge the entire bulb; the top cut must be exposed to air to prevent rot.
- Place on a bright, sunny windowsill for optimal growth.
- Change the water every single day to prevent bacterial growth and foul odors.
- Transplant into potting soil after a few weeks if you want a permanent, long-lasting harvest.
- Save rotten or failed bulbs for homemade vegetable broth.
Frequently Asked Questions
Can I regrow other vegetables in water just like spring onions?
Yes! You can use the exact same shallow-water method to regrow the tops of carrots, beets, and radishes (which produce edible leafy greens), as well as celery bases, leeks, and romaine lettuce hearts.
How many times can I regrow the same spring onion?
If kept exclusively in water, a spring onion will generally produce two to three good harvests before running out of energy and becoming thin and flavorless. If you transplant the bulb into nutrient-rich soil, it can continue producing fresh greens for many months.
Does the regrown spring onion taste different?
The first regrowth in water will taste identical to the original store-bought onion. However, subsequent water-only regrowths will taste progressively milder and more watery, because the plant is lacking soil nutrients.
Can I use the white part of the regrown onion?
If you pull the bulb out to eat the white part, the plant will die and you will have to start over with a new store-bought scrap. To maintain a continuous harvest, only snip the green hollow tubes, leaving the solid white base intact to generate new growth.
Why is the water in my glass turning cloudy?
Cloudy water is a sign of bacterial growth caused by plant matter breaking down. This happens quickly in stagnant water. Ensure you are changing the water daily and gently rinsing the roots under the tap if they feel slippery or slimy to the touch.
Track Your Fridge Inventory Automatically with Tarif!
Tired of discovering expired food hidden in the depths of your refrigerator? Download the Tarif app. Use our digital pantry tracker to log purchase dates, receive alerts for ingredients nearing expiration, and get instant recipes designed to rescue those exact items. Download Tarif App Now and start saving today!