How to Make Homemade Vegetable Broth from Kitchen Scraps
Published Date:
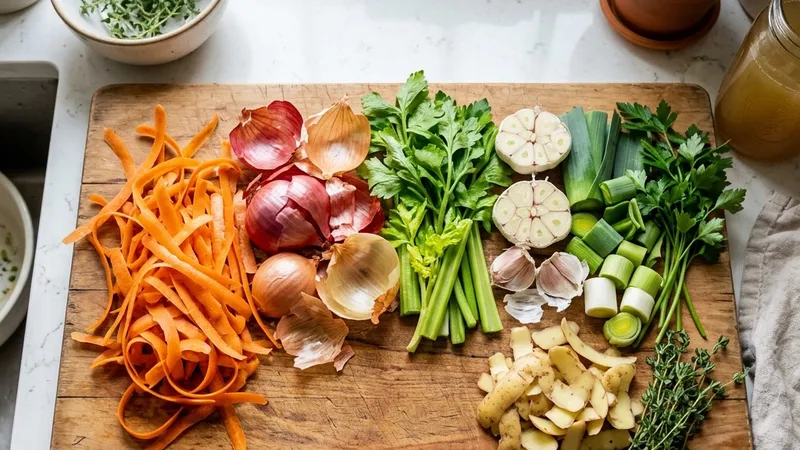
Cooking healthy, plant-forward meals inevitably leaves behind a mountain of vegetable trimmings: onion skins, carrot tops, celery ends, and papery garlic husks. Most people scrape these directly into the compost bin or, worse, the trash can. However, these discarded pieces are packed with flavor compounds and essential nutrients. Instead of throwing them away, you can easily collect and transform them into a rich, aromatic, and deeply flavorful homemade vegetable broth.
This zero-waste kitchen habit saves you money on store-bought cartons and gives you a sodium-controlled, chemical-free base for soups, stews, and grains. Once you realize how easy it is to brew “liquid gold” from trash, you will never buy boxed vegetable stock again.
Why Homemade Vegetable Broth is a Kitchen Essential
Store-bought vegetable broth is often a massive disappointment. When you read the ingredient label, you will typically find that the primary ingredient is water, followed by massive amounts of sodium, yeast extract, and artificial flavorings to compensate for a lack of real vegetable content. Commercially produced broths are flash-cooked at high temperatures to ensure shelf stability, a process that destroys the delicate, aromatic nuances of fresh vegetables.
In contrast, homemade vegetable broth is brewed slowly, allowing the complex flavors of the root vegetables and herbs to fully extract into the water. It serves as an invisible flavor enhancer in your daily cooking. Cooking quinoa or rice in homemade broth instead of plain water turns a boring side dish into a restaurant-quality grain bowl. If you practice weekly Sunday meal prep, having a stash of homemade broth in your freezer means you can instantly whip up a hearty soup or a rich pan sauce without a second thought. Making broth at home is also a closed-loop food system: you squeeze every last drop of value out of the groceries you bought before they finally hit the compost bin.
Step-by-Step Solution: Brewing Zero-Waste Liquid Gold
Making vegetable broth doesn’t require a strict recipe. It is more of a relaxed, intuitive process. Follow these steps compiled by our zero-waste kitchen assistant Tarif to build a continuous broth-making system in your home.
Step 1: Collecting the Right Scraps (And What to Avoid)
Not all vegetable scraps make good broth. Some are incredible flavor builders, while others will ruin the entire pot.
- The Golden Additions: The holy trinity of broth is onions (including the papery skins, which provide a beautiful golden color), carrots (including the green tops), and celery (including the leafy ends). Other excellent additions include garlic skins, leek greens, mushroom stems, parsley stalks, and tomato ends.
- What to Avoid Strictly: Never add cruciferous vegetables (broccoli, cauliflower, Brussels sprouts, cabbage) to your broth. As they boil, they release sulfur compounds that will make your entire batch taste bitter and smell like flatulence. Avoid starchy vegetables like potatoes or turnips, as they will turn the broth cloudy and thick. Finally, avoid beets unless you want a bright pink broth that tastes strongly of dirt.
Step 2: The Freezer Bag Method
You do not need to make broth every single time you cook dinner. Instead, designate a large, heavy-duty freezer bag or a rigid plastic container specifically for scraps. Keep it permanently in your freezer. Every time you chop an onion, peel a carrot, or trim spring onions that you didn’t regrow in water, toss the clean trimmings into the bag. Because the scraps are frozen immediately, they won’t rot or attract fruit flies. Once the bag is completely stuffed (which usually takes a few weeks of normal cooking), you have enough material to brew a batch.
Step 3: The Slow Simmering Process
When your scrap bag is full, it is time to brew.
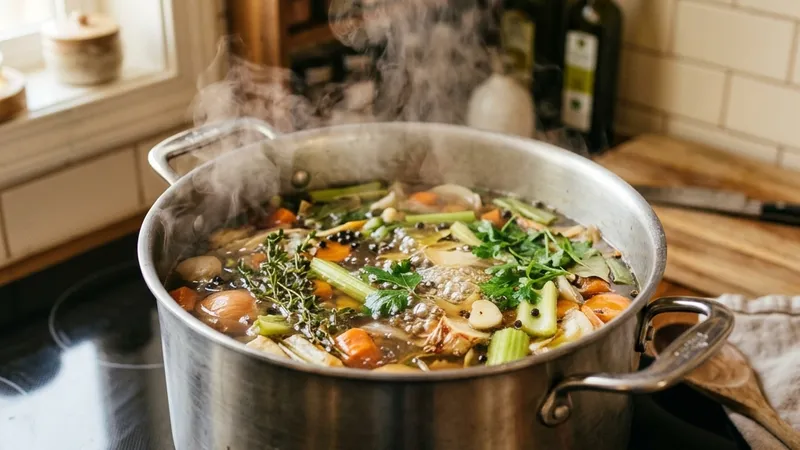
- Empty the frozen scraps directly into a large stockpot or Dutch oven. There is no need to thaw them first.
- Add a few aromatics if you have them: a couple of dried bay leaves, a teaspoon of whole black peppercorns, and perhaps a sprig of fresh thyme.
- Pour in just enough cold tap water to barely cover the vegetables. If you use too much water, your broth will be weak and diluted.
- Bring the pot to a rolling boil over high heat, then immediately reduce the heat to low, cover the pot, and let it simmer gently.
- Simmer for exactly 45 to 60 minutes. Unlike meat-based bone broths that require 12 hours of boiling to extract collagen, vegetables release their flavors very quickly. Boiling vegetables for more than an hour will cause them to break down completely, resulting in a muddy, bitter liquid.
Step 4: Straining and Storing
Once the simmering is done, the actual vegetables have given up all their flavor and nutrients to the water.
- Place a fine-mesh strainer (or a colander lined with cheesecloth) over a large, heat-proof bowl. Carefully pour the contents of the pot into the strainer.
- Using the back of a wooden spoon or a ladle, press down hard on the mushy vegetable solids to extract every last drop of flavorful liquid. The remaining solid mash can now finally go to the compost bin.
- Let the strained golden broth cool to room temperature before transferring it to storage containers.
Prevention: Avoiding Bitter or Cloudy Broth
The two most common complaints from beginners are that their homemade broth tastes bitter or looks unappetizingly murky.
To prevent bitterness, make sure no broccoli, kale, or cabbage scraps sneak into your freezer bag. Also watch the ratio of onion skins. While they provide great color, an entire bag composed only of onion skins will result in an overwhelmingly sharp, bitter flavor. Aim for a balanced ratio of aromatics to sweet root vegetables (like carrots).
To prevent cloudy broth, never let the pot boil violently. A gentle, barely bubbling simmer is the key to clear liquid. Additionally, ensure all your vegetable scraps are washed thoroughly before going into the freezer bag; a clump of dirt attached to a carrot top will muddy the entire batch.
When to Seek More Help or Watch for Edge Cases
If you are incredibly pressed for time and cannot afford to baby a simmering pot on the stove for an hour, the Instant Pot or electric pressure cooker is a phenomenal edge-case solution. You can dump your frozen scraps into the pressure cooker, add water, and set it to high pressure for just 15 minutes, followed by a natural pressure release. The intense pressure extracts the flavors incredibly fast and traps all the aromatic steam inside the pot instead of evaporating it into your kitchen.
If you find that your finished broth tastes slightly bland, do not panic. It is actually preferable to leave homemade broth unsalted during the brewing process. This allows you to control the exact sodium levels later when you use the broth in a specific recipe, preventing a dish from becoming overly salty when the liquid reduces down in a pan.
Quick Summary
- Keep a dedicated freezer bag to continuously collect clean onion, carrot, celery, and mushroom scraps.
- Strictly avoid cruciferous vegetables (broccoli, cabbage) as they make the broth bitter.
- Do not over-boil; simmer the scraps for a maximum of 60 minutes to extract flavor without creating a muddy texture.
- Press the cooked vegetables firmly in a strainer to extract the most concentrated liquid.
- Leave the broth unsalted until you actually cook a recipe with it to control your sodium intake.
- Freeze leftover broth in ice cube trays for easy portioning into sauces and stews later.
Frequently Asked Questions
Can I use fruit scraps like apple cores in vegetable broth?
Generally, no. Fruit scraps will add an unwanted sweetness and fruity acidity that clashes with the savory profile of a traditional vegetable broth. An exception can be a small piece of apple if you are making a specific Asian-style broth, but for everyday versatile stock, stick strictly to vegetables.
Why is my homemade vegetable broth so dark?
The color of your broth is entirely dependent on the scraps you used. Red onion skins and mushroom stems will create a very dark, rich brown broth, whereas yellow onion skins and celery will yield a lighter golden color. The dark color is purely cosmetic and often packs a deeper, earthier flavor.
How long does homemade vegetable broth last in the fridge?
Fresh, unpreserved homemade broth will last for 4 to 5 days in a sealed container in the refrigerator. Because it contains no artificial preservatives or high sodium levels, it spoils much faster than store-bought cartons.
What is the best way to freeze vegetable broth?
If you plan to use it for soups, freeze it in large glass mason jars (leave at least two inches of space at the top, as the liquid will expand and crack the glass if overfilled). If you only need small amounts for sautéing or pan sauces, freeze the broth in silicone ice cube trays, then pop the frozen cubes into a freezer bag.
Can I leave the vegetable broth cooking in a slow cooker all day?
While slow cookers are great for meat broths, they are not recommended for vegetable broth. Leaving vegetables to cook for 8-10 hours in a slow cooker will cause them to completely disintegrate, resulting in a bitter, starchy, and cloudy liquid. Stick to the 60-minute stovetop rule.
Reduce Food Waste with Tarif!
Ready to master zero-waste cooking and manage your refrigerator inventory efficiently? Download the Tarif app. Use our smart recipe finder and pantry manager to make the most of what you have. Download Tarif App Now and start cooking smart!